
Good evening!
This dev log is actually going to cover the last two weeks. I didn’t end up writing one last week because we only had a single development session, so I’m rolling everything together into one larger update.
Despite that, we’ve actually had a very productive couple of weeks!
We’re still working our way through the game development series I’ve been following. It’s a 95-part series, so progress sometimes feels slow, but we managed to get through two particularly long episodes this week. Both were around 50 minutes long, and Wednesday’s stream ended up running for over five hours. I didn’t even finish the entire video that day because I was just too tired by the end of it. A lot of the time wasn’t spent writing code, but trying to understand what problem we were actually solving before implementing the solution…and scrolling on TikTok.
That brings us to this week’s work.
Last Week: Player Spawner
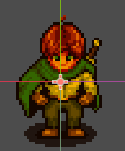
The main feature from last week’s session was implementing a player spawner.
Previously, each level contained its own player instance. This works perfectly fine for a small project, but it becomes increasingly awkward as the game grows. Instead, we now spawn the player through code whenever the level loads.
He is yellow but don’t fret! The actual player is not yellow- just the spawner.
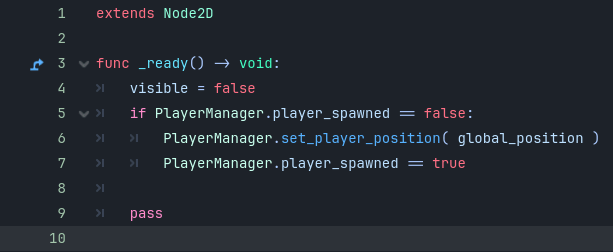
The system works by creating a player instance when the game starts, placing it at a designated spawn point, and then allowing the rest of the game to reference that player. It’s not the most exciting feature visually, but it’s one of those foundational systems that makes development significantly easier.
Being able to quickly move spawn points around and test individual levels without manually setting up a player every time is going to save a lot of time moving forward.
With that completed, we moved into this week’s much larger set of tasks.
Scene Transitions
The first major system we tackled was scene transitions.
The goal here was to allow the player to move between separate levels rather than keeping everything inside one massive map. Instead of building one enormous scene, we can now create multiple connected levels and move seamlessly between them.
The basic idea is simple:
A level contains a transition node. When the player enters that node, the game loads another scene and places the player at a corresponding transition point in the new level.
What sounds simple on paper ended up producing a surprisingly large number of problems.
Variables Loading in the Wrong Order
The first issue involved exported variables.
My collision areas were being updated through exported properties, but those setters were firing before the node’s @onready variables had been initialised. The result was a lot of mysterious null reference errors that didn’t immediately make sense.
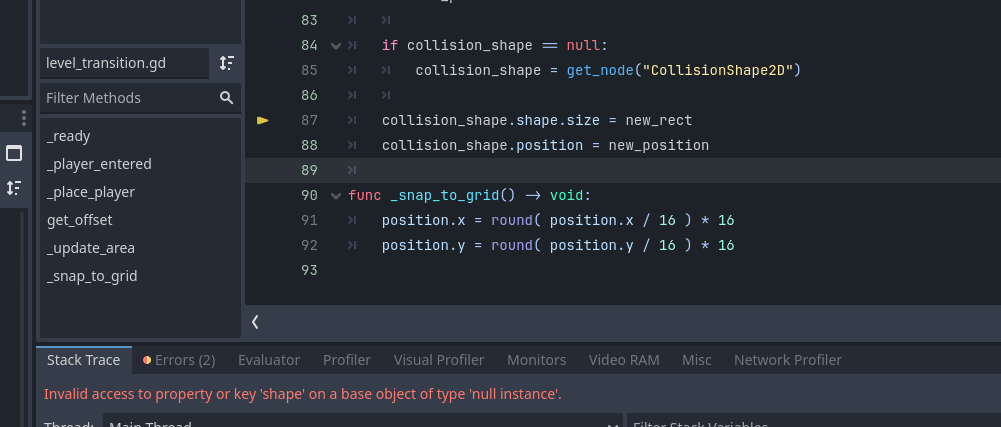
^ The original error. The transition node was attempting to access its collision shape before the node had finished initialising.
The fix ended up being relatively straightforward. By checking is_node_ready() before rebuilding the collision area, we could ensure those updates only happened after the node had finished initialising.
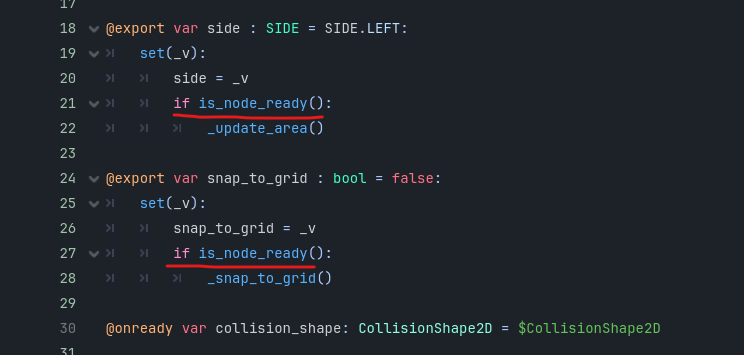
Simple fix!
The Grey Screen of Doom
The next issue was a scene loading order problem.
After transitioning between scenes, all I would see was a giant grey screen. After digging through the code, the culprit turned out to be a signal issue. The system was emitting level_load_started when it should have been emitting level_loaded.
In practice, this meant the new level would load successfully and then immediately tell itself to delete itself. Needless to say, that produced some fairly confusing results.
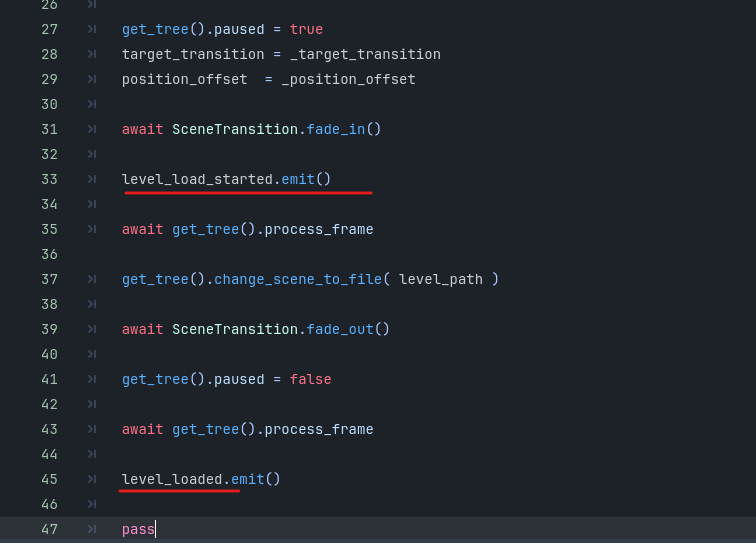
Thankfully, once we tracked down the signal, the fix only took a few minutes.
Also wow- look at how straight I drew the lines on that screenshot.
The Great Transition Loop
The next problem was far more entertaining.
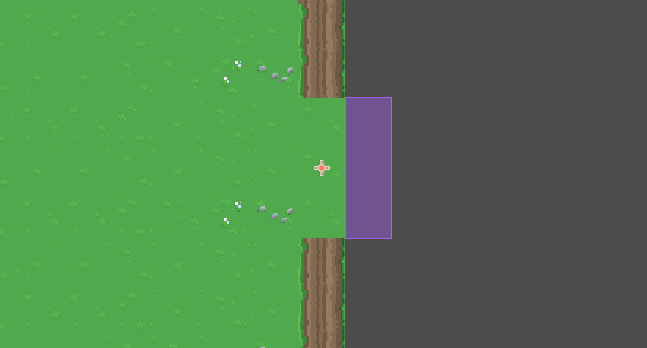
The tutorial used a player placement offset of 16 pixels when spawning into a new scene. Unfortunately, my transition areas were large enough that 16 pixels wasn’t enough clearance.
The player would spawn partially inside the transition trigger. The result? Instantly teleporting back to the previous level. Which would then spawn the player partially inside the original trigger. Which would instantly teleport them back again.
The player effectively became trapped in a never-ending loading loop between scenes.
Increasing the spawn offset from 16 pixels to 32 pixels solved the problem immediately.
One of those bugs that’s annoying until you realise the answer is literally just “move the player further away.” To be honest, I’m not sure if there is a more cement way to fix this, but it worked for me.
The One Tab That Broke Everything
Perhaps the most frustrating bug of the entire week came down to a single tab character.
At one point, an else statement had a single incorrect level of indentation. One tab. That’s it.
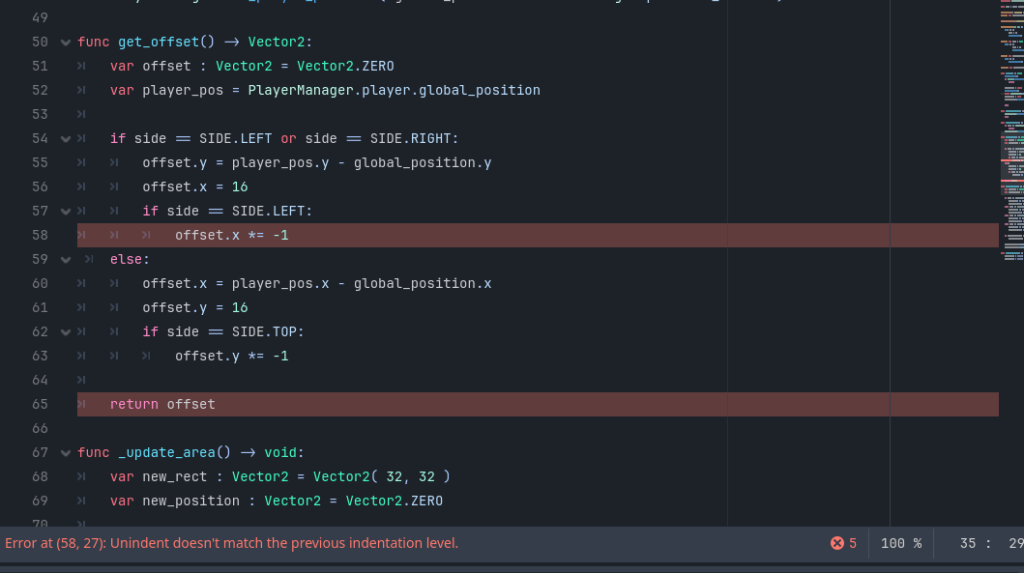
The code looked fine. The logic looked fine. The solution looked fine.
Godot disagreed.
Several minutes later, and I mean REALLY like, 45 minutes, I finally saw the problem. the PESKY else statement.
Directional Transitions
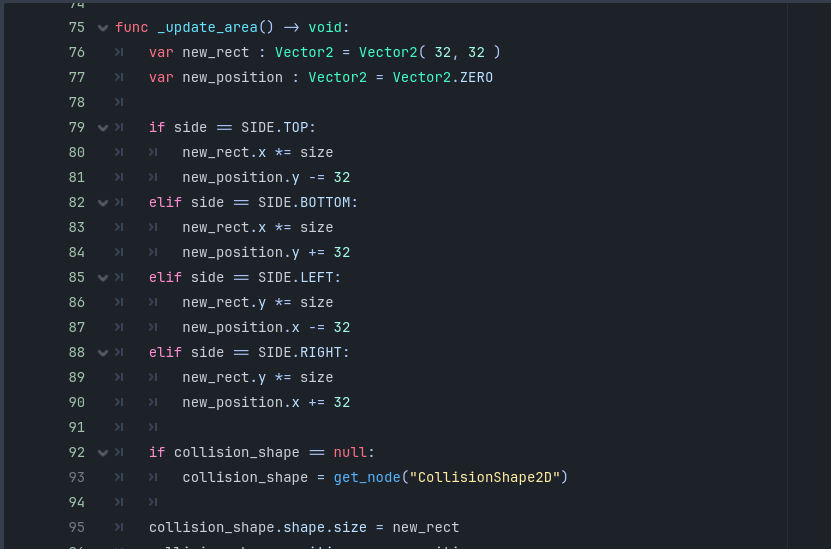
One particularly important part of the system was supporting directional transitions.
Each transition can now be configured as:
- Top
- Bottom
- Left
- Right
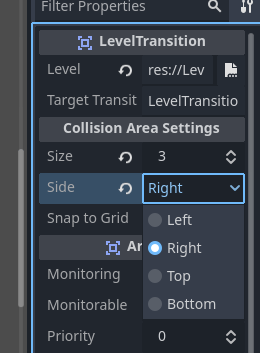
This allows the player to maintain a natural sense of movement between connected areas. If a player exits through the top of one level, they enter through the bottom of the connected level. Likewise for left and right transitions.
It sounds like a small detail, but it makes the world feel much more cohesive and prevents the player from appearing in strange or disorienting positions after loading.
Transition Effects
To finish things off, we added fade transitions between levels.
The transition fades to black, loads the next scene, and then fades back into gameplay.
Naturally, I managed to accidentally reverse the fade functions at one point, which resulted in another round of confusion before realising I’d effectively named them backwards.
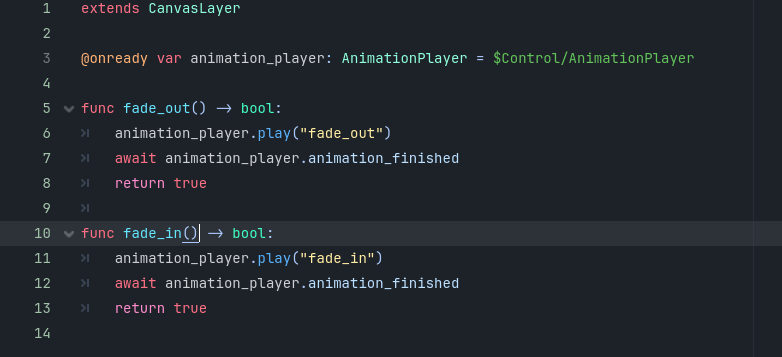

Thankfully that fix was considerably less painful than some of the others.
At the end of all of this, we now have fully functioning scene transitions between Levels 1, 2 and 3.
Early Visual Development
Alongside all of the programming work, I also started experimenting with some visual assets for the game.
The biggest one this week was creating a tree asset that will likely end up being one of the first pieces of artwork that actually represents the final visual direction of the project.
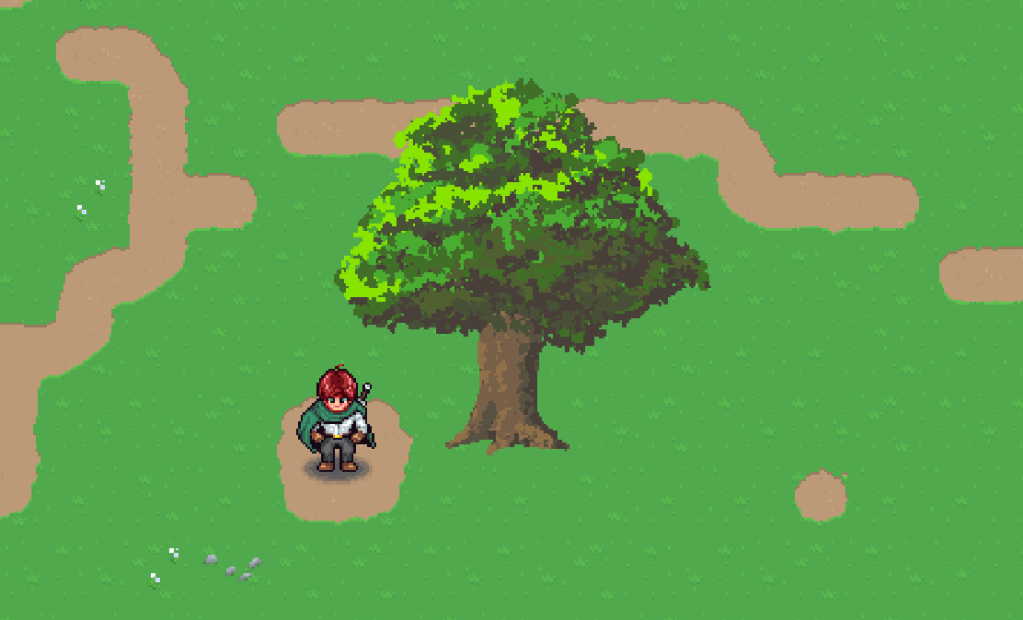
Overall, I’m pretty happy with how it turned out. The art style feels close to what I have in mind, and perhaps more importantly, it was surprisingly quick to create. When you’re building an entire game by yourself, production speed matters just as much as quality, so that’s a really encouraging sign.
That said, there is one major issue I need to solve.
Right now, the tree feels very side-on. It doesn’t really read as an isometric asset, which means it stands out against the perspective I’m aiming for. The colours, shapes and overall style feel right, but the viewing angle still needs some work.
Even so, this feels like an important milestone. Up until now, a lot of the project has existed as systems, placeholders and ideas. This is one of the first visual assets that feels like it’s genuinely moving toward the final look of the game.
It’s exciting to finally start seeing pieces of the world take shape!
Over the next few weeks, I’d like to continue refining the visual style while building out more environmental assets. The goal is to establish a workflow that lets me create artwork quickly while still maintaining a consistent and recognisable look throughout the game.
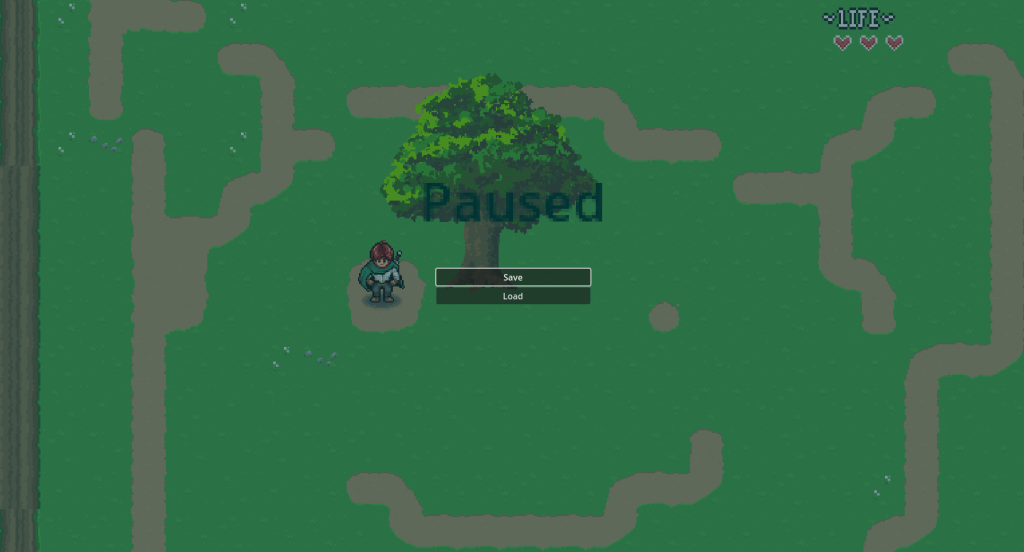
Pause Menu & Save System
Friday’s stream focused on creating a pause menu.
This one went significantly faster. We managed to get through the entire tutorial section in around three and a half hours, which felt lightning fast compared to Wednesday.
The pause menu does exactly what you’d expect:
- Pauses gameplay
- Displays a menu overlay
- Allows saving
- Allows loading
The only issue we ran into involved the buttons not being clickable.
It turned out the player HUD and the pause menu were effectively fighting over canvas priority. There are multiple ways to solve this. The simplest would have been adjusting the canvas layer ordering directly, but I wanted to follow the tutorial’s approach and understand why it worked, so I implemented the solution exactly as demonstrated.
Once that was fixed, everything worked smoothly!
Saving and Loading
The save system is currently fairly basic.
At the moment it stores:
- Player position
- Health
- Level information
- A handful of variables intended for future systems

The system writes this information to its own save file and can load the player back into the correct position when the game starts.

There’s not a huge amount of meaningful data being saved yet because we haven’t built inventory systems or progression systems.
Which brings me to the next step.
Looking Ahead
Rather than immediately jumping into item systems and inventory storage, I want to take a step back and revisit the Game Design Document.
The GDD isn’t bad, but it’s extremely descriptive. It reads more like a creative document than a production document.
Rather than immediately jumping into item systems and inventory management, which is the next section of the tutorial, I want to take a step back and spend some time revisiting the Game Design Document. While the GDD isn’t in a bad state, it’s become quite descriptive over time and reads more like a creative reference than a production document.
Before moving deeper into development, I’d like to refine some of the core design decisions, revisit my expectations for the project, and re-familiarise myself with the first few levels to make sure everything still aligns with the vision I have for the game.
Alongside that, I want to shift some focus toward creating visual assets. Up until now, a lot of the work has been on systems and foundations, but it’s time to start building more of the world itself.
My immediate focus will be on creating artwork for the camp scene, developing assets for Level One, and producing some NPC sprites so the world begins to feel more alive. More broadly, I want to continue experimenting with environmental assets and world-building pieces so I can establish a consistent visual style before larger-scale level production begins.
I would love to start building dialogue systems as well, but I want to approach that carefully rather than rushing into a branching conversation system before I know exactly how I want it to work.
For now, I’m focusing on manageable pieces.
Personal Updates
Outside of game development, my competition on Lenny unfortunately got cancelled due to bad weather.
I did still ride him today though.
He was…something.
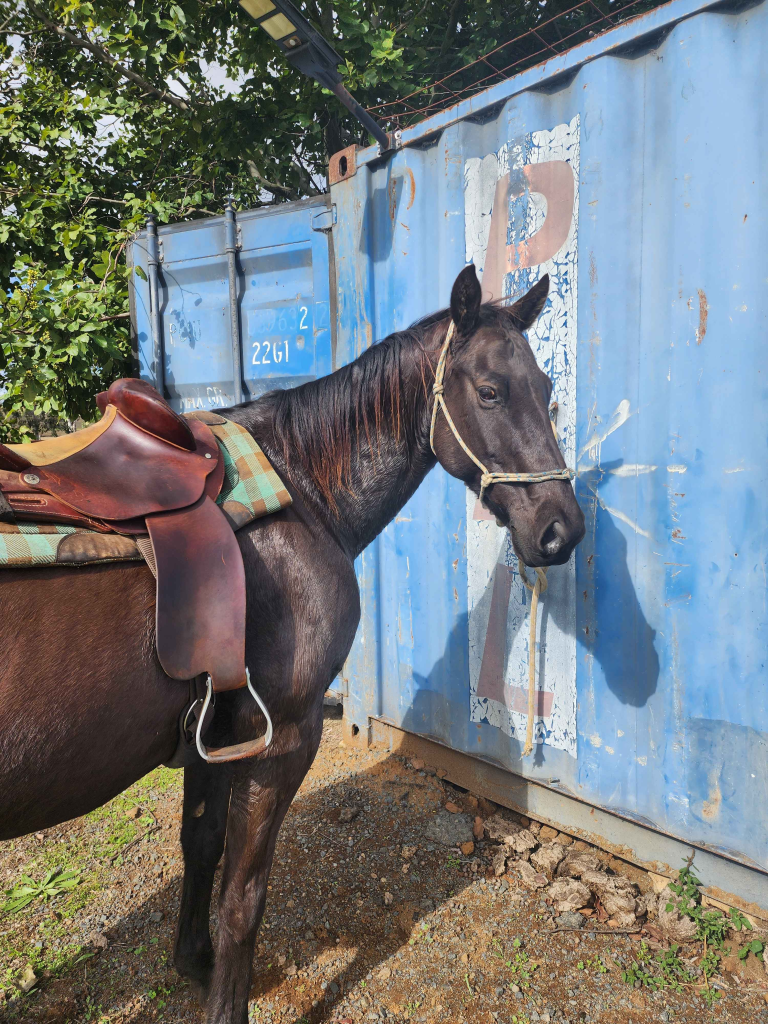
The recent green grass has apparently convinced Lenny that rules are more of a suggestion than a requirement, so we had a very educational ride. He came out feeling fresh, energetic, and with a few strong opinions about what he wanted to do.
For anyone imagining dramatic horse-training methods, an “attitude adjustment” is much less exciting than it sounds. When Lenny gets testy, he might throw in a buck or take off, or try to spin on me; all things that could become dangerous! The solution is usually simple: we keep working. We’d canter circles until I could feel him starting to tire, stop for a rest, let him think about his life choices for a moment, and then pick up the canter again. If he decided he still wanted to argue, we’d continue working, he’d keep moving his feet. If he decided cooperation was the easier option, we’d call it a win.
A big part of the ride wasn’t even the attitude so much as his attention span. He was incredibly interested in what was happening literally everywhere else. Every horse, every noise, every motorbike in the distance seemed far more important than the person sitting on his back. A lot of the session was simply about bringing his attention back to me through different cues, asking him to move his feet, back up, change direction, and generally making sure he was listening and engaged rather than mentally wandering off.
Eventually, he figured it out. The canter became softer, the responses became quicker, he wasn’t trying to take off on me, and his attention started staying where it was supposed to. By the end of the ride he was working really nicely. He was still quite fresh but I won’t hold it over him, he’s had 3 weeks off after all.
He got a bath afterwards and was sent back out to his paddock to enjoy the rest of his day.
On the fitness side of things, gym is going really well.
I’ve already managed four workout sessions this week and my cardiovascular fitness has improved dramatically. Riding Lenny as hard as I did today would have left me much more exhausted a few months ago. This time I barely felt gassed.
We’re also getting closer to moving house. There are still a few pieces of paperwork to sort out before the sale is finalised, but hopefully that process will be wrapping up soon.
Finally, we had a brief discussion on stream about potentially organising a community game jam team.
The idea would be to get members of the Twitch community involved and create a Team AyeeJ! We would enter a game jam, it would be awesome.
I haven’t worked through the logistics yet, so nothing is locked in, but it sounds like it could be a really fun project and something I’d love to explore further.
Final Thoughts
This week ended up being one of those weeks where the systems don’t necessarily look impressive from the outside, but they dramatically improve the foundation of the game.
We now have:
- Player spawning
- Multi-level scene transitions
- Directional level connections
- Fade transitions
- Pause functionality
- Save and load systems
A lot of these features are invisible when they’re working correctly, but they’re the systems that make building the rest of the game possible.
As always, thanks for following along, and I’ll see you in the next dev log!

Leave a comment